 elepay
クイックスタート
1 回の API 呼び出しで、最初の EasyQR 決済用 QR コードを作成する
本ガイドに従って、1 回の API 呼び出しで最初の EasyQR コードを作成し、ブラウザ上で実際にスキャンできる決済用 QR コードを確認しましょう。全工程でテストモードを使用するため、実際の決済は発生しません。
EasyQR とは
EasyQR は elepay が提供する動的な決済用 QR コードです。サーバー側で code を 1 つ作成すると、お客様は QR コードをスキャンするだけで PayPay やクレジットカードなど数十種類の方法で支払えます。QR コードを Web サイトやデバイスに組み込む完全な方法は EasyCheckout をご覧ください。
はじめる前に
必要なものは テスト用シークレットキー(Secret Key) のみです。
- elepay 管理画面にログインし、左側の「開発設定 / API」からテスト用シークレットキーを取得します。形式は
sk_test_…のようになります。詳しい取得手順は初期設定をご覧ください。 - テスト用シークレットキーはテストモードに対応します。実際の決済チャンネルには接続されず、実取引も発生しないため、安心して試せます。
Secret Key はすべての API 操作権限を持つため、サーバー側でのみ使用してください。コードリポジトリへのコミットやフロントエンドへの露出は絶対に行わないでください。
ステップ 1:EasyQR コードを作成する
POST /codes にリクエストを送信すると、EasyQR コードを 1 つ作成できます。テスト用シークレットキーを環境変数にセットしてから、以下をそのままコピーして実行できます。
export ELEPAY_SECRET_KEY=sk_test_… # ← あなたのテスト用シークレットキー

curl -X POST https://api.elepay.io/codes \
  -H "Authorization: Bearer $ELEPAY_SECRET_KEY" \
  -H "Content-Type: application/json" \
  -d '{
    "amount": 500,
    "currency": "JPY",
    "orderNo": "quickstart-0001"
  }'
認証方式
elepay は Bearer 認証と Basic 認証の両方に対応しています。上記の例では Bearer(シークレットキーをトークンとして使用)を利用しています。Basic を使う場合は、シークレットキーをユーザー名に指定し、パスワードは空にします。詳しくは API ガイドをご覧ください。
リクエストフィールド(完全な定義は Create EasyQR code を参照):
| フィールド | 必須 | 説明 |
|---|---|---|
amount | はい | 決済金額(整数)。JPY は円単位(500 は ¥500) |
orderNo | はい | 貴社システム側の注文番号。最長 50 文字で、注文照合に使用 |
currency | いいえ | 通貨コード(ISO 4217)。デフォルトは JPY |
作成に成功すると 201 を返します。レスポンスボディは code オブジェクトです(以下は例で、実際のフィールド値はアカウントにより異なります):
{
  "id": "code_xxxxxxxxxxxxxxxx",
  "object": "code",
  "liveMode": false,
  "amount": 500,
  "currency": "JPY",
  "orderNo": "quickstart-0001",
  "status": "pending",
  "codeUrl": "https://pay.elepay.io/code/xxxxxxxxxxxxxxxx",
  "expiryTime": 1717200000000,
  "createTime": 1717199400000
}
特に注目すべきフィールド:
| フィールド | 意味 |
|---|---|
id | EasyQR コードの一意な識別子。以降の照会 / クローズ時に使用 |
liveMode | false はテストモードを示す(テスト用シークレットキーで作成) |
status | 新規作成時は pending(未払い)。支払い完了後は captured に変わる |
codeUrl | お客様向け支払いランディングページの URL——次のステップで使用 |
ステップ 2:決済用 QR コードを確認する
レスポンス内の codeUrl をブラウザにコピーして開くと、elepay がホストするチェックアウトページが表示されます。左側に金額、右側に決済用 QR コードと利用可能な支払い方法が並びます。
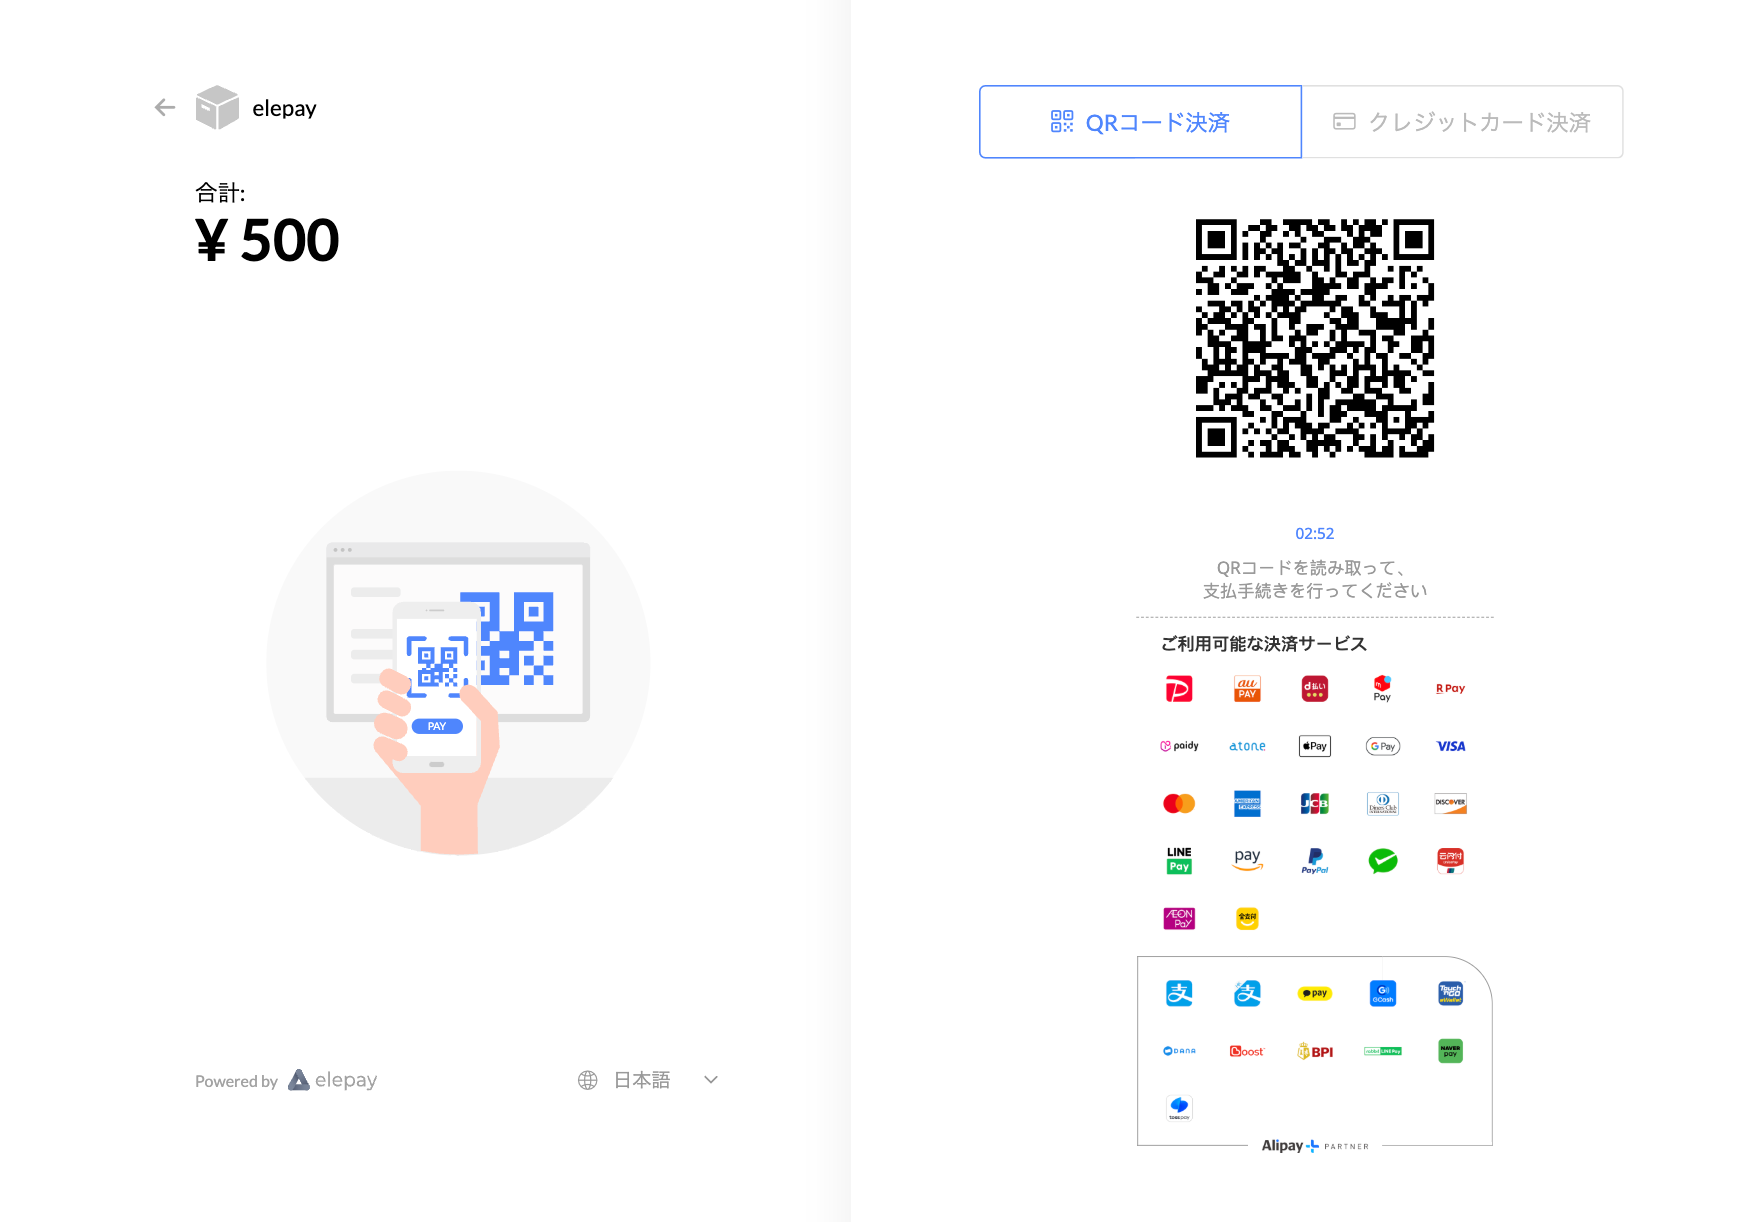
お客様がこの QR コードをスマートフォンでスキャンすれば、PayPay やクレジットカードなどの方法を選んで支払えます。
🎉 おめでとうございます
これが API で作成した最初の EasyQR コードです——elepay 決済の中核である、作成から QR コード生成までの流れを確認できました。
QR コードページに利用可能な支払い方法がないと表示される場合は、まず管理画面の「簡単決済 > 設定 > 決済方法管理」で少なくとも 1 つの支払い方法を有効化してください。
次のステップ
- Web サイトやデバイスに組み込む:EasyCheckout の導入(ホスト型ページ / 埋め込み型 Widget の 2 通り)
- 支払いステータスを照会する:Retrieve EasyQR code
- すべてのフィールドを把握する:Create EasyQR code
- 実際の決済を開始する:管理画面で支払い方法の開通を完了したら、テスト用シークレットキーを本番用シークレットキー(
sk_live_…)に差し替えるだけです
最終更新日